

From global economic uncertainty to the breakneck pace of digital transformation, the business landscape has been going through major changes over the past few years. Ironclad’s Workflow Designer Conditions allow businesses to stay agile in this new environment, speeding up the contracting process while ensuring compliance. Ironclad has helped businesses across all industries turn contracting from a cost center into a competitive differentiator.
Now we’re excited to introduce your next competitive advantage, Workflow Designer Advanced Conditions. With Advanced Conditions you can leverage formulas even further: anything you can express with a formula, you can now use to power conditions. To help you make the most of this new feature, we’ve created a list of best practices to guide your workflow design process. We’ve also outlined five ways to try Advanced Conditions for yourself. Let’s dig in.
Best Practices for Leveraging Advanced Conditions
-
Create fields
Every workflow in Ironclad comes with a set of default contract properties like Workflow Launch Date and Signing Date. These properties are all pre-configured — Ironclad collects the relevant data for you. In addition to these defaults, Ironclad allows you to create custom fields.
When deciding what fields to incorporate in your workflow, start with the data you need to collect in your contract. Think as well about the key contract information you’ll want to report on down the line to inform your business processes.
When you ask yourself, “What information do I need to collect from my end user for this contract?” or “What information do I need to track for reporting purposes?”, you’ll find that the keywords uncovered in the answers–” I need to collect counterparty information to populate the contract document” or “I need to track contract term length to understand the term distribution of my contracts“–will lead directly to the custom fields you’ll want to create.
-
Name your fields and conditions
As you incorporate your own fields and conditions into a workflow, it’s important to consider a naming convention. When naming fields, keep your audience in mind. Those involved in reviewing and approving contracts will see and work with your fields, so make sure field names are meaningful and easy to understand for them. Additionally, fields should be named appropriately for your reporting needs. Aim to name key fields the same across your workflows for easier and more accurate reporting.
For example, instead of naming your field “Total Contract Value” in your SOW workflow and “Contract Value” in your MSA workflow, choose one convention for both workflows to standardize terminology across your contracts.
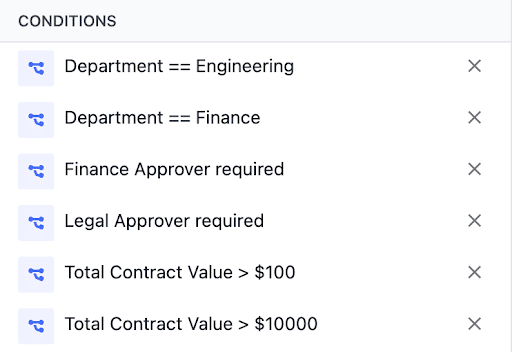
For conditions, we recommend choosing concise, consistent, and indicative names. That way everyone in your organization will be able to understand the purpose of the condition and the action it is driving.
-
Organize your contract metadata
Contracts can get complex when lots of fields are required in a workflow. You can reorder your contract metadata in Workflow Designer to organize and group metadata into sections. This order will be reflected in workflows. We recommend grouping metadata by function and ordering by importance. For example, metadata your contract reviewers will frequently reference throughout review should be included in the first section.
Tip: If there are fields you do not want to be immediately visible to your contract participants during review, create a new section and add these fields. Then, set the section to be collapsed by default.


-
Using formulas in fields and conditions
Workflow Designer formulas let you use logic to automate your contracts. Keep it simple or build complex formulas, depending on what your processes demand. You can find a list of all available formulas in our help center.
Use a formula in a field to:
- Derive data from another field, like calculating Total from Price and Quantity
- Access and extract information from your user roles, like your approvers and signers
- Access and extract information from Ironclad’s default contract properties like Workflow Launch Date or Signing Date
Use a formula in a condition to:
- Define complex logic to drive your contract process
Follow these tips when using formulas:
- Build with yourself and your team in mind. Avoid large formulas that will be difficult for you, or someone at your company, to understand and manage later.
- If you have fields and conditions collected or calculated only to serve as inputs for another field or condition, consider using a formula instead. Formulas can reduce the number of fields and conditions in your workflows to help simplify and modularize your data. Keep reading to see an example.
- As always, keep your use case in mind. Ask yourself what the goal of your formula fields and conditions are.
Five Ways to Use Advanced Conditions
Now to put those best practices to real-world use! Here are five easy ways to get started with Advanced Conditions in Workflow Designer:
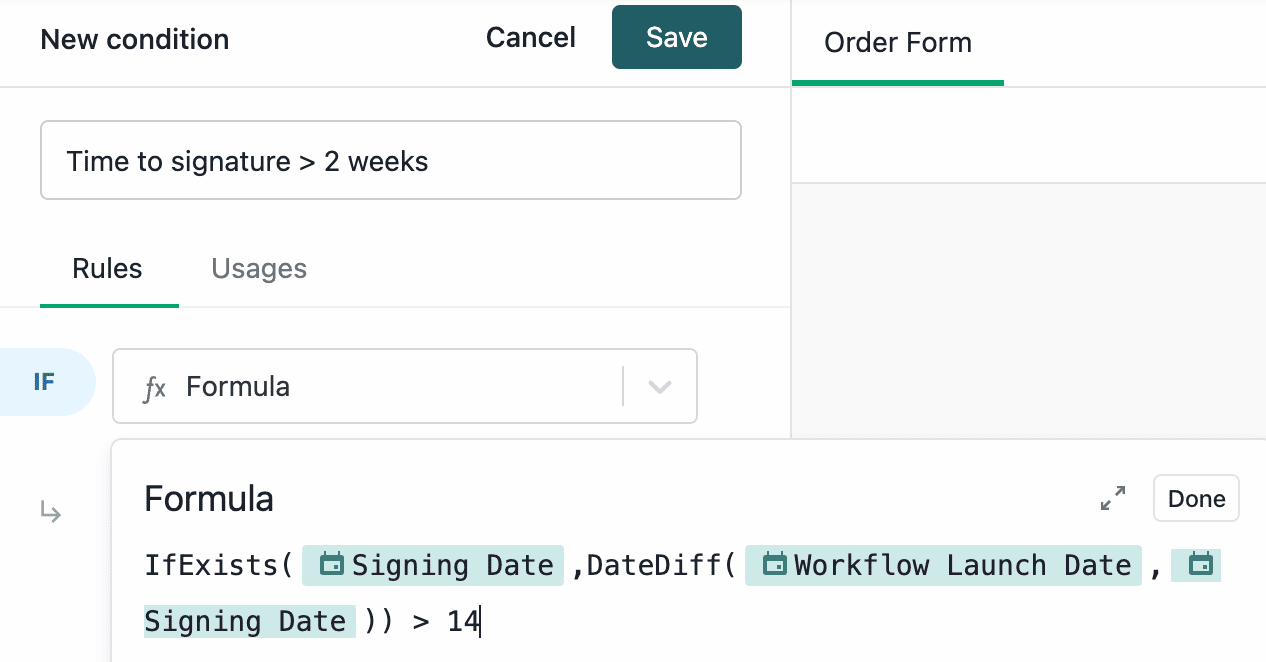
- Calculate the time from launch to signature
Access and leverage default contract properties using formulas. Use the IfExists formula to handle values that will be calculated later in the contract. Once the contract completes signature, Time to signature will be calculated; until signature, it will be an empty value.
- Understand roles at a glance
Use the UserAttribute formula to access standard and customizable attributes like the name, email address, and title of your approvers, signers, and other roles in your workflow.

- See if your counterparty is in the USA
Rather than creating an intermediate field Operating country and using it in another condition Operating Location == USA:


You can do this all in one Advanced Condition with a formula, removing the need to maintain Operating country:

- Trigger legal approval based on document updates
Rather than rewriting logic, reference and reuse your existing conditions to populate larger conditions so that updates only need to be made in one place.

- Send an internal form to a new hire’s manager if their proposed salary is missing or exceeds the standard base salary
Use operator notation to shorten your formulas.

Build Faster with Formulas
Start building your workflows faster and more intuitively with Advanced Conditions. Remember to always keep your use case in mind, and keep your formulas short and sweet when you can, so your colleagues can easily understand them. Learn more about Advanced Conditions in Workflow Designer.
Not an Ironclad customer? Get in touch with one of our contract specialists today to see how Ironclad helps you speed every part of the contracting process.
Ironclad is not a law firm, and this post does not constitute or contain legal advice. To evaluate the accuracy, sufficiency, or reliability of the ideas and guidance reflected here, or the applicability of these materials to your business, you should consult with a licensed attorney. Use of and access to any of the resources contained within Ironclad’s site do not create an attorney-client relationship between the user and Ironclad.


